This week’s design showcase was about working with adjustment layers, masks, and tools to modify a provided image. We were provided three images from which to choose and I immediately gravitated towards the bouquet image which may have to do with the fact that I was at a wedding this weekend and am currently in the process of planning my own wedding.

Once I downloaded my image I opened this in Photoshop and changed the height to 8 inches while the width scaled proportionally to 5.3 inches. My color mode remained in RGB with a 300 dpi setting.
After modifying my image size I duplicated my initial layer so I could use the clone stamp tool to add additional flowers to the bouquet. It was important to duplicate my original layer so I could go back to this if I was not pleased with the look of the additional flowers. The clone stamp tool is a wonderful tool that allows you to sample a portion of an image and duplicate this in another area. Using this tool with an adjusted brush size, and hardness I was able to add more flowers to the bouquet. The before (left) and after image are included below.


Once I had additional flowers in the bouquet I duplicated this layer. To help blend the additional flowers into the bouquet I used the smudge tool. This tool picks up color from where you initially place it and smears it into adjacent colors. It is almost as if running your finger through wet paint.
My next step was duplicating this layer and using the dodge tool to lighten the color on the arm, hand, and white flowers. The dodge tool allows you to lighten pixels within an image using a brush that can be adjusted in size, hardness, range and exposure. I also used the sharpen tool on this layer at the settings below to enhance the details in the ring.
![]()
The before (left) and after close up photos of the hand and ring are below.


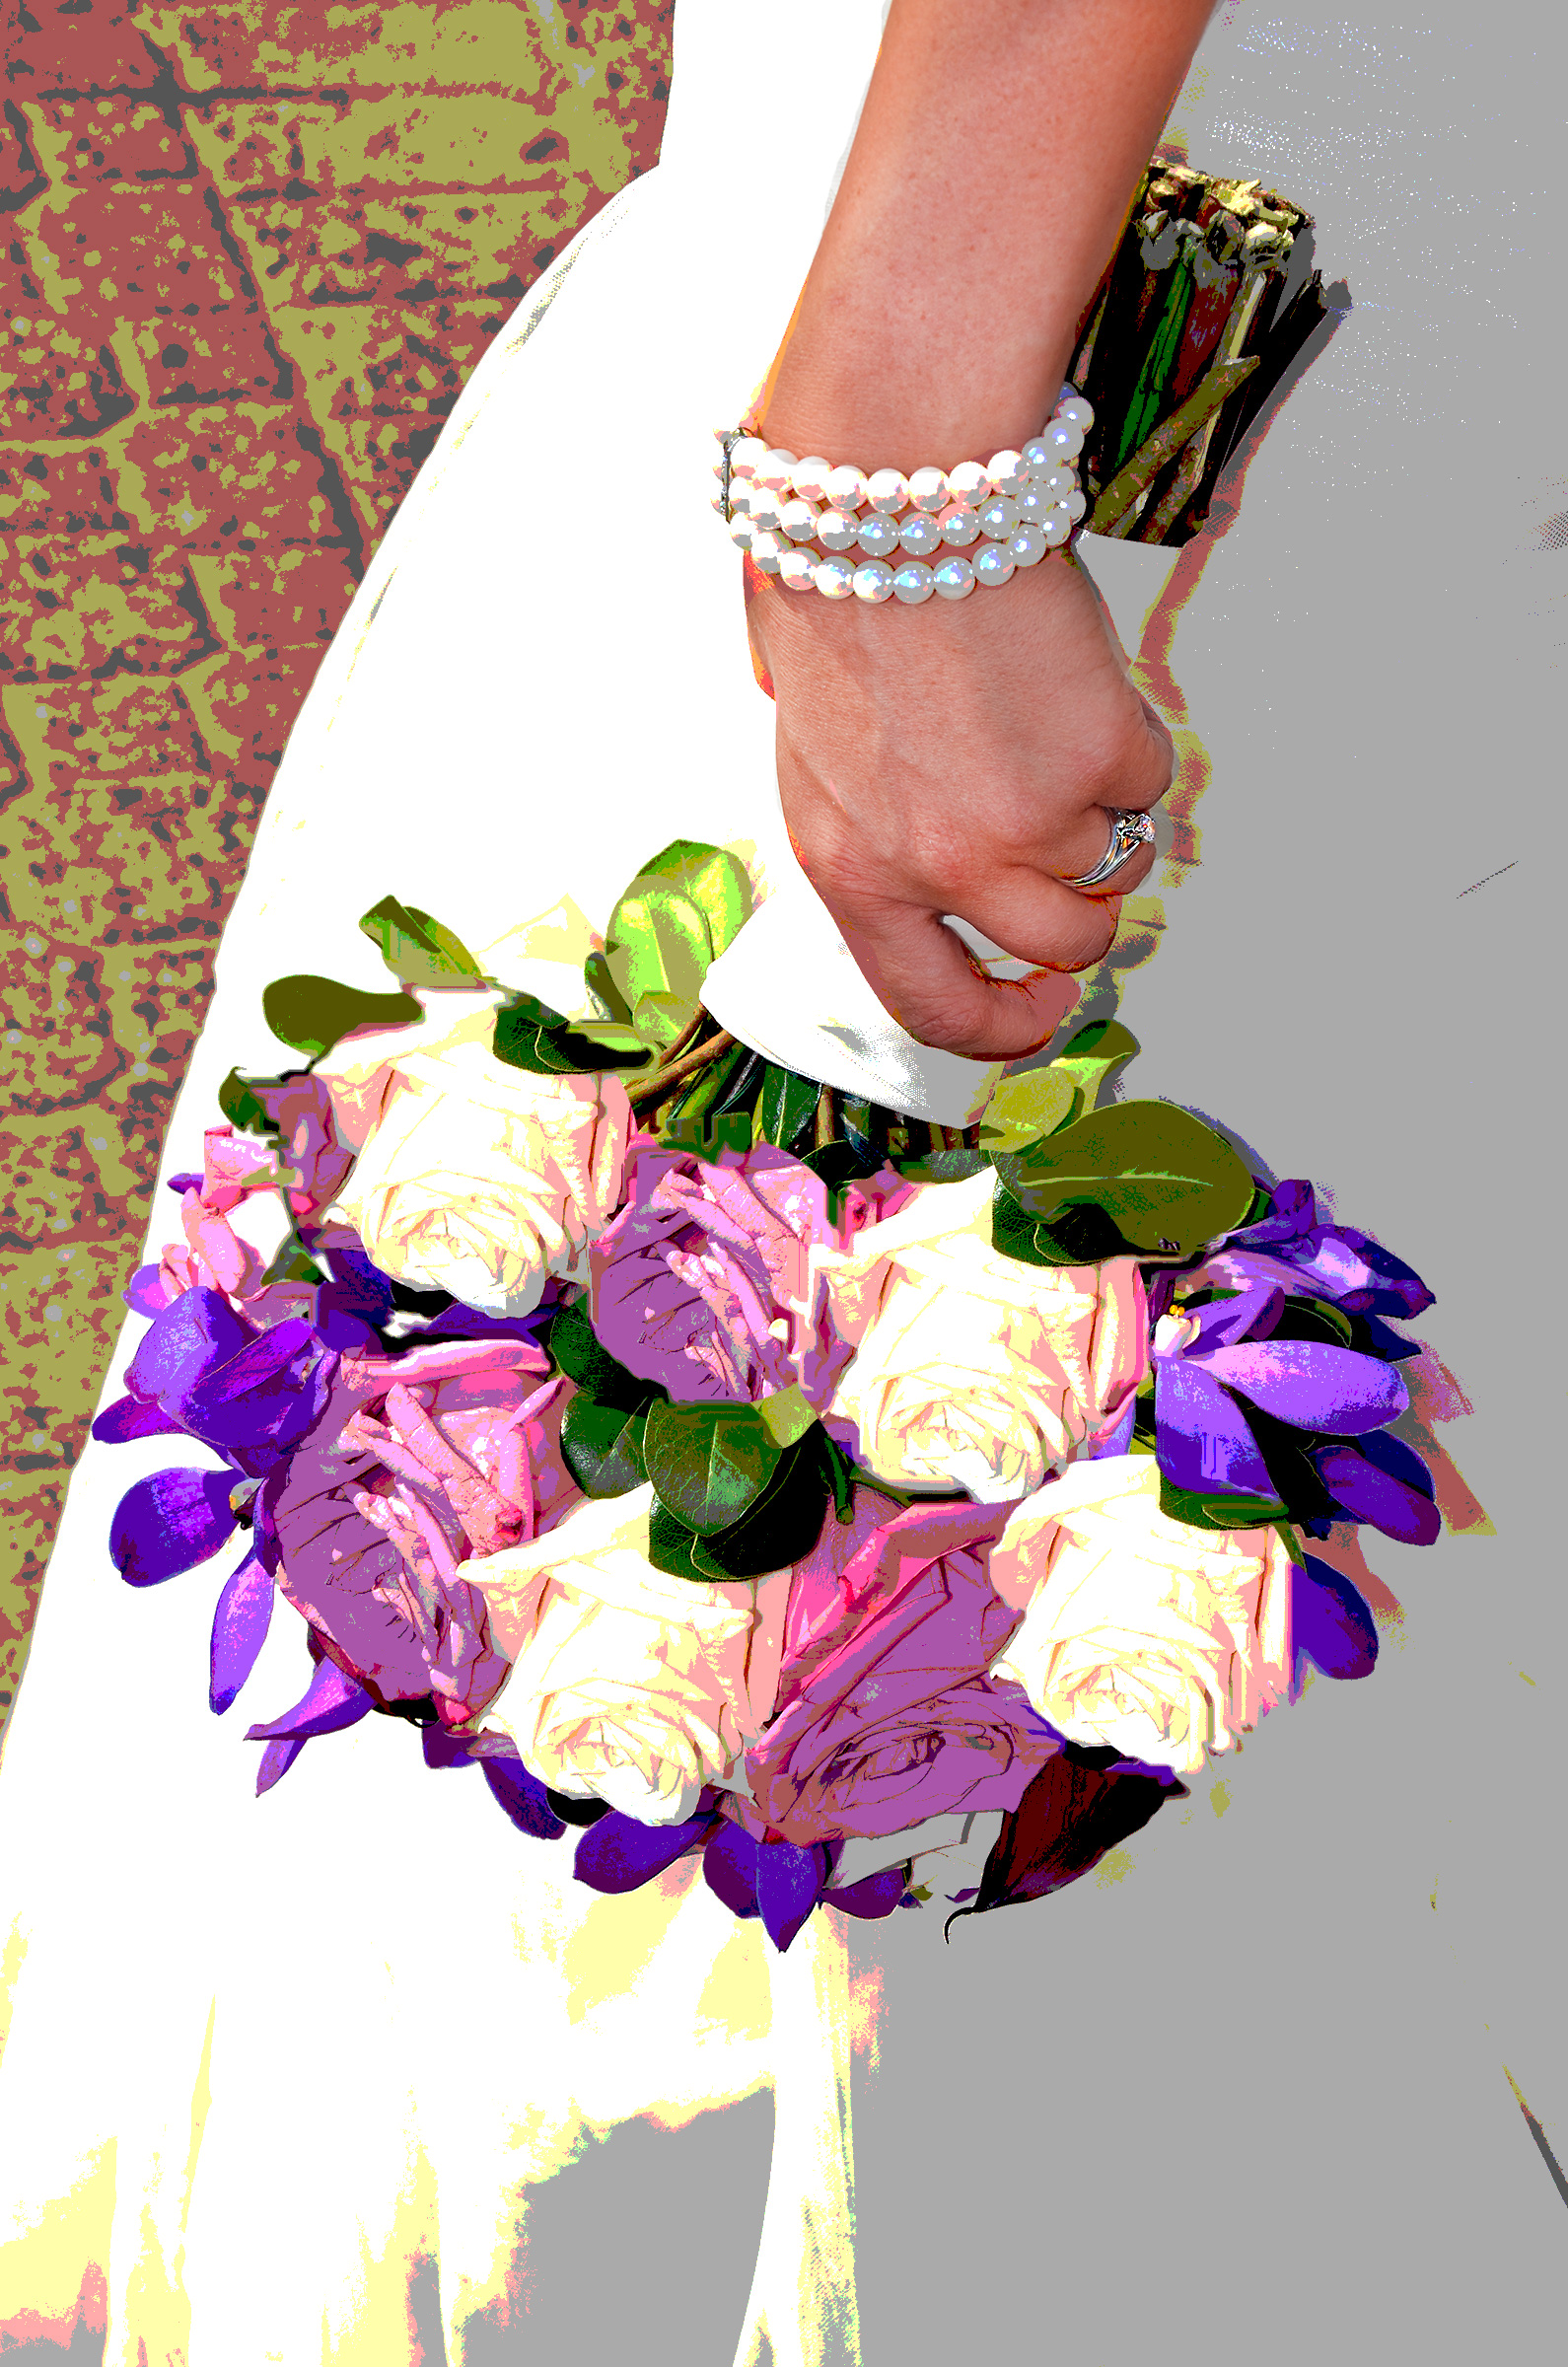
Once I made those edits I applied a Posterize adjustment layer to the image. I wanted the image to have an abstract look to it while maintaining the original look of the hand and arm. To achieve this, I added a vector mask to the layer and used the brush tool at 79 px size with black as my color and proceeded to remove the pixels on this layer to reveal the hand and arm in its appearance below. Before I started using my brush I checked to make sure my foreground color was black with white as my background color.
My final step was creating another adjustment layer in Black & White with an 85% opacity. In this layer I wanted everything in the image to appear in black & white except for the bouquet and ring. I used a similar process as I did in the previous layer by creating a vector mask and removing the pixels over the bouquet and ring. Masks are a great tool to use to reveal or cover pixels in an image and can be turned off or removed easily.
Included below are the original image (left), my image in color (middle), and with the black and white adjustment layer with mask (right).


The tools used:


